Apni Pathshala

Apni pathshala 

Tinkercad: 3D Modeling in 10 Days

By

The microcourse on 3D modeling using Tinkercad is a concise yet comprehensive learning experience tailored for beginners eager to delve into the world of digital design. Leveraging Tinkercad’s intuitive interface, participants will be guided through the essentials of 3D modeling, starting with basic geometric shapes and progressing to more intricate structures. Emphasizing hands-on practice, the course covers fundamental concepts such as scaling, rotation, and grouping, ensuring that participants acquire practical skills. Additionally, the microcourse may explore design principles, problem-solving strategies, and considerations for 3D printing. By the conclusion of the course, participants will be proficient in navigating Tinkercad, capable of crafting their own 3D models, and equipped with the knowledge to apply their newfound skills to a variety of creative and practical endeavors

DAY 1

Introduction to 3D Shapes

  • Shapes used: Box, Cylinder, Cone, Star, Torus, Tube
  • Modification: Move, Rotate

Content of the day:

  • Introducing 3D objects, dragging and placing object in the screen from toolbar.
  • Moving and rotating object, resizing to desired size and position.
  • Using aligner tool to align objects by selecting multiple objects at a time
  • Using hole object to carve solid object to make different shapes.

DAY 2

TASK : HOW TO BUILD A HOUSE

  • Shapes used: Box, Roof
  • Modification: Move, Rotate, Create Group

Procedure:

  • Create box for the wall of the house followed by a hole inside it who L x B x H is 2 units less than box.
  • Use small boxes as holes, move to desired position for creating windows and door.
  • Use roof move to top.
  • Create Group to remove holes and make your output.

DAY 3

TASK : Building Christmas Tree

  • Shapes used: Cone, CylinderStar
  • Modification: Move, Rotate, Copy

Procedure:

  • Create a box for the wall of the house followed by a hole inside it who L x B x H is 2 units less than box.
  • Use small boxes as holes, move to desired position for creating windows and door.
  • Use roof move to top.
  • Create Group to remove holes and make your output.

DAY 4

TASK : Building Rocket

  • Shapes used: Cone, CylinderStar, Paraboloid
  • Modification: Move, Rotate, Copy

Procedure:

  • Create a box for the wall of the house followed by a hole inside it who L x B x H is 2 units less than box.
  • Use small boxes as holes, move to desired position for creating windows and door.
  • Use roof move to top.
  • Create Group to remove holes and make your output.

DAY 5

TASK : Building Robot

  • Shapes used: Box, Cylinder, Sphere
  • Modification: Move, Rotate, Copy, Create Group

Procedure:

  1. Create a Box of desired size for the body, followed by a cylinder for legs and hand.
  2. Move the objects up, left and right using move block.
  3. Another box to create head and use sphere to attach eyes
  4. Use box with make foot and cylinders to make fingers.

Note: you can add more attachments to make the model more elegant.

DAY 6

Task: Revision session

Let the students make something with their creativity with their learning using

  • Objects
  • Move
  • Rotate
  • Copy
  • Scale

DAY 7

TASK : Building Fruit Bowl

  • Shapes used: Torus
  • Modification: Move, Rotate with Pivot, Copy, Repeat, Create Group

Procedure:

  1. Create a Torus of desired size with wall thickness less than 2 units.
  2. Move the objects up, right using move block and tilt using rotate.
  3. Using repeat block, copy and rotate the torus object with pivot values set to 0.
  4. Run the repeat until it covers 360 degree

DAY 8

TASK : Building Tealight Candle Holder

  • Shapes used: Cylinder, Start
  • Modification: Move, Rotate with Pivot, Copy, Count, Create Group

Procedure:

  1. Create a big Cylinder followed by another cylinder which is 1 unit lesser radius inside as a hole to make a bore.
  2. Place a star at the edge of the cylinder as hole to cut the shape
  3. Use Count loop and copy and mode it around followed by increment in z axis once 360′ is completed.
  4. Create group to cut out all the hole.

DAY 9

TASK : Building Watch Tower

  • Shapes used: Box, Cylinder, Cone
  • Modification: Move, Rotate with Pivot, Copy, Repeat, Scale, Create Group

Procedure:

  1. Create a box to make steps, copy and rotate with pivot, followed by move upwards using repeat block.
  2. Use the Cylinder to make the column and torus to make the fence.
  3. Use the cone to make the roof and move to the top.
  4. Create openings by using holes in desired places to make entrance.

DAY 10

TASK : Let the students make model on the own with topics related to

  • Science
  • Technology
  • Physics
  • Art
  • History
  • Products
  • Space

Learnings

Throughout this session, students have not only grasped the fundamental concepts of 3D modeling but have also translated their ideas into tangible digital designs.

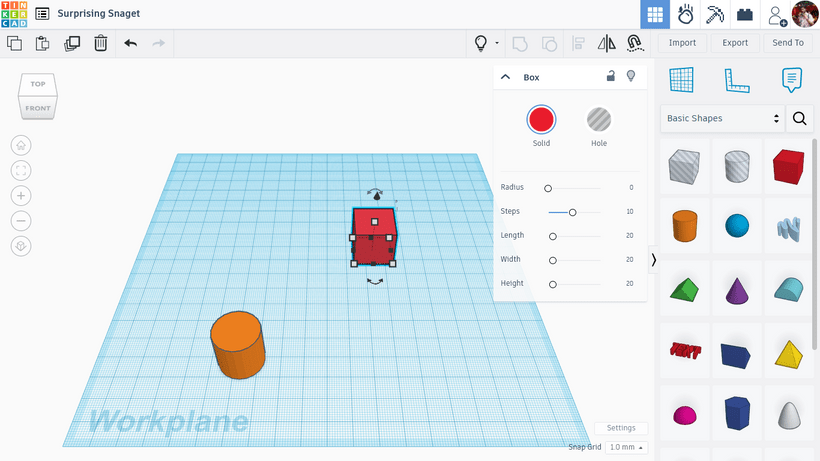
  1. Understanding the Basics: We started with the essentials, ensuring everyone was well-versed in navigating the Tinkercad interface, utilizing the toolbar, and dragging objects onto the canvas.
  2. Manipulating 3D Objects: From moving and rotating objects to using the aligner tool, students have acquired the skills needed to precisely position and orient their creations.
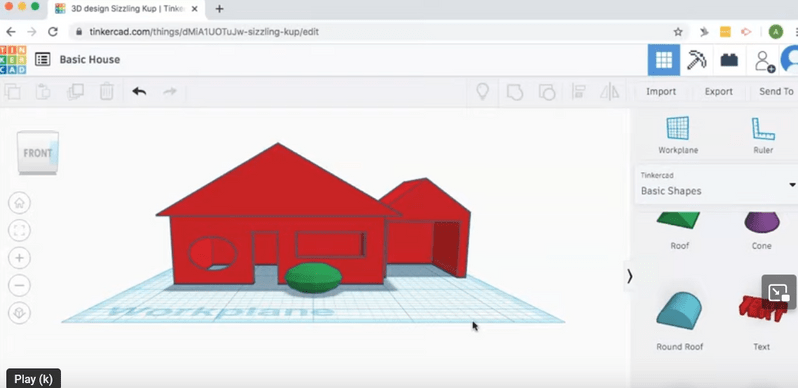
  3. Carving and Crafting: The introduction of the hole tool opened up a new dimension in design, allowing students to carve out intricate shapes and create more complex structures.

Conclusion:Over the past 10 days, students immersed themselves in the Tinkercad 3D modeling class, mastering the art of dragging, placing, moving, and rotating objects with precision. Through hands-on practice, they harnessed the power of the aligner and hole tools, unleashing their creativity to craft diverse shapes. This immersive journey has not only equipped them with essential skills but also fueled their passion for digital design.

Leave a Reply

Your email address will not be published. Required fields are marked *

Tinkercad: 3D Modeling in 10 Days